Hi there 👋, In this article, you will learn how to deploy Jenkins on a Kubernetes cluster with persistent volume.
What is Jenkins?
Jenkins is an open-source automation tool written in Java programming language that allows continuous integration. Jenkins builds and tests our software projects, continuously making it easier for developers to integrate changes to the project, and making it easier for users to obtain a fresh versions of the live app without downtime.
Prerequisites
- A Kubernetes cluster (whether local or live, e.g. AWS EKS, AKS, GKE, etc.)
- Basic knowledge of Kubernetes.
Note:
We will be creating 3 resource types on Kubernetes
- A deployment
- A service
- A Persistent Volume Claim (to persist Jenkins data )
Steps
- Create a directory to store the Kubernetes manifest files and cd into it.
mkdir jenkins-dep && cd jenkins-dep
2. Create 2 manifest files, One containing the Persistent Volume Claim and the other containing the deployment and service.
touch jenkins-pvc.yaml jenkins-deploy.yaml
3. Use nano to edit the jenkins-pvc.yaml file by running the command below:
nano jenkins-pvc.yaml
Paste the following into the editor:
apiVersion: v1
kind: PersistentVolumeClaim
metadata:
  name: jenkins-pvc
  namespace: default
spec:
  accessModes:
    - ReadWriteOnce
  resources:
    requests:
      storage: 5Gi  # Adjust size as needed
Use “Control S” and “Control X” to save and quit the terminal.
4. Use nano to edit the jenkins-deploy.yaml file by running the command below:
nano jenkins-deploy.yaml
Paste the following into the editor:
apiVersion: apps/v1
kind: Deployment
metadata:
  name: jenkins
  namespace: default
spec:
  replicas: 1
  selector:
    matchLabels:
      app: jenkins
  template:
    metadata:
      labels:
        app: jenkins
    spec:
      initContainers:
      - name: init-permissions
        image: busybox
        command: ["sh", "-c", "chown -R 1000:1000 /var/jenkins_home"]
        volumeMounts:
        - name: jenkins-data
          mountPath: /var/jenkins_home
      containers:
      - name: jenkins
        image: jenkins/jenkins:lts
        ports:
        - containerPort: 8080
        volumeMounts:
        - name: jenkins-data
          mountPath: /var/jenkins_home
      volumes:
      - name: jenkins-data
        persistentVolumeClaim:
          claimName: jenkins-pvc


---

apiVersion: v1
kind: Service
metadata:
  name: jenkins-service
  namespace: default
spec:
  type: LoadBalancer
  ports:
    - port: 80
      targetPort: 8080
  selector:
    app: jenkins
Use “Control S” and “Control X” to save and quit the terminal.
The next thing to do is to apply the files but lets discuss a little bit some parts of the files above and the order of creation in kubernetes.
- The Persistent Volume Claim:
A persistent volume (PV) is the “physical” volume on the host machine that stores your persistent data. A persistent volume claim (PVC) is a request for the platform to create a PV for you, and you attach PVs to your Jenkins pods via a PVC as referenced here in the jenkins-deploy.yaml file.
volumes:
      - name: jenkins-data
        persistentVolumeClaim:
          claimName: jenkins-pvc
2. The Load Balancer Service Type
A service in Kubernetes helps to expose pods to the network, and a load balancer service in Kubernetes exposes the pods to the internet (this is used here because you may want to log in to your Jenkins dashboard from anywhere using your browser).
Creating the resources:
Since we now have a basic understanding of how the files work, the next step is to apply them in order for the resources to be created.
Note:
In Kubernetes, Order Of Creation (OOC ) matters, so we will create the PVC first before the deployment and services, to do that run the following command:
kubectl apply -f jenkins-pvc.yaml
Confirm that the resource was created by running the command below:
kubectl get pvc
you should see something like this.

It may take some time to move from pending to bound
The next step is to apply the jenkins-deploy.yaml service by running the command below:
kubectl apply -f jenkins-deploy.yaml
You should see something like this.

You can see the pod by running:
kubectl get pods
Final Step:
The last step before you login to your Jenkins dashboard is to copy the service Ip address and you can do that by running:
kubectl get svc
You should see something like this.
NAME                   TYPE           CLUSTER-IP     EXTERNAL-IP    PORT(S)               AGE
jenkins-service        LoadBalancer   10.0.66.146    4.154.255.34   80:31746/TCP          6m37s
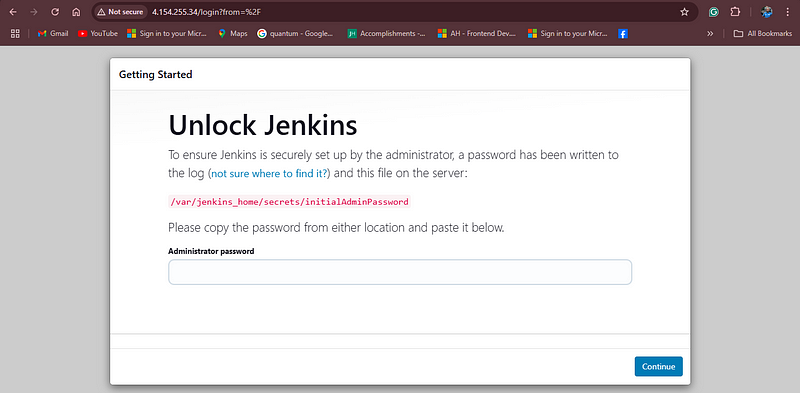
Copy the EXTERNAL IP and paste it into your browser; you should see a page like this.

to get the password, you need to login to the Jenkins pod by running the command below to get the pods and exec into the pod
kubectl get pods
You should see something like this
NAME                           READY   STATUS    RESTARTS          AGE
jenkins-58d9cb475c-pgm52       1/1     Running   0                 10m
Now exec into the pod by running the command:
kubectl exec -ti jenkins-58d9cb475c-pgm52 bash
replace “jenkins-58d9cb475c-pgm52” above with your pod name.
When you are logged in, run the command below to get the jenkins admin password:
cat /var/jenkins_home/secrets/initialAdminPassword
You should see something like this.
kubectl exec [POD] [COMMAND] is DEPRECATED and will be removed in a future version. Use kubectl exec [POD] -- [COMMAND] instead.
Defaulted container "jenkins" out of: jenkins, init-permissions (init)
jenkins@jenkins-58d9cb475c-pgm52:/$ cat /var/jenkins_home/secrets/initialAdminPassword
724193e952274d35b11403db691fd3b7
jenkins@jenkins-58d9cb475c-pgm52:/$
Copy the printed password and paste it on the page.
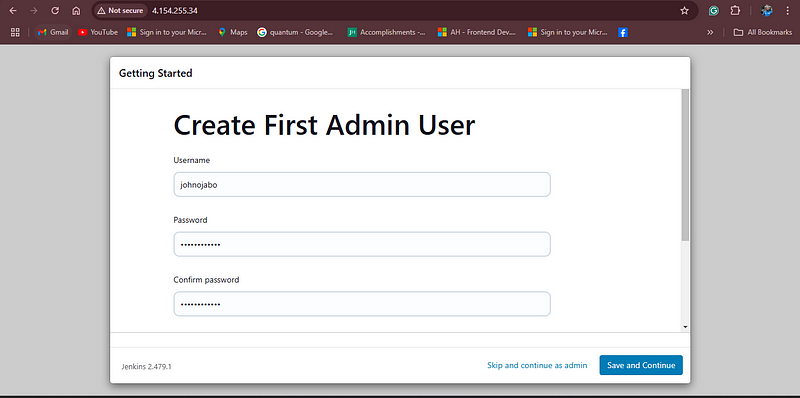
and after that, you should install suggested plugins and then you will see a page to create an admin user

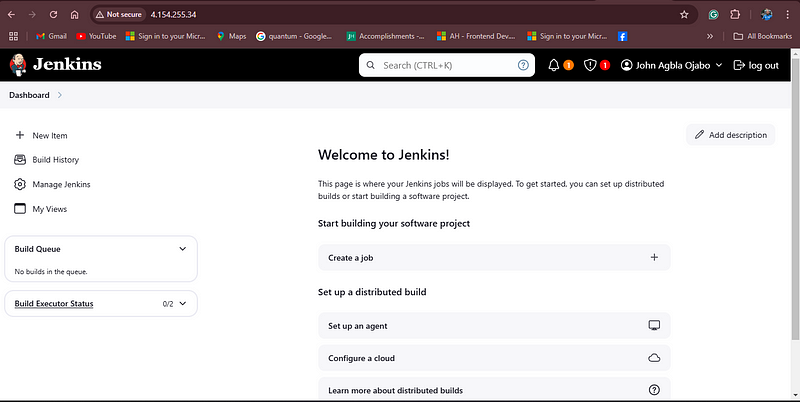
After that’s done, you should see your Jenkins dashboard!

Conclusion
You have successfully deployed Jenkins on Kubernetes with persistent volumes and have learned a comprehensive approach to managing CI/CD pipelines in a scalable environment. By configuring persistent storage, you ensured that Jenkins data remains intact across restarts, enhancing resilience and reliability.
Please leave some claps and share if this has helped you (or you know anyone it will help)
