Recently, I was asked to host a static website on Microsoft Azure for a company I work for.
Another requirement was that I use Azure DevOps for continuous integration and cloud deployment (CI/CD) for all testing, building, and deployment.
Having used AWS and Google Cloud for nearly everything over the past 2 years, I’m relatively new to the world of Azure, so I wanted to use this as a way to record the process.
I decided to use Azure Storage over Azure App Service (S3 and Elastic Beanstalk being the respective AWS equivalents) as there were only a few static assets to host, such as an index.html file, some CSS, and a couple of images (ASSETS). The infrastructure that comes out of the box with any PaaS (Azure App Service / Beanstalk) seemed unnecessary here as I like to reduce my cost footprint wherever possible.
Prerequisites:
- You must have a Microsoft Azure Account with an active/valid subscription.
- You Must have Administrative privilege on the subscription
Steps
1. Create a Resource Group:
A resource group is a container that holds related resources for an Azure solution. The resource group can include all the resources for the solution. To do this, login to the Azure portal at www.portal.azure.com. On the search bar above, type Resource Groups
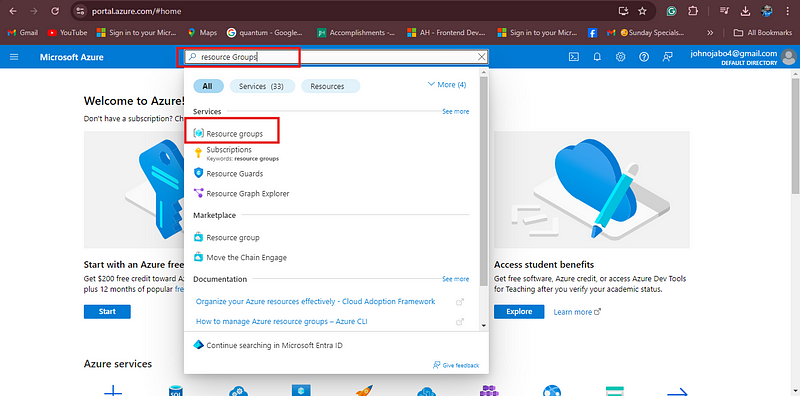
Click on resource Groups, and Click on Create at the top left corner
Next, you choose your active subscription, input the name of the resource group, and select the region of your choice (You may choose the region you want your resources to be deployed but it’s not compulsory)
The next step is to tag your Resource Group (RG) although this is optional but is a good practice and it helps to group your billing data.
Click Review + Create and then finally click Create, if you get any error its probably because of the basic information like the name.
2. The next step is to create an Azure Storage Account
To do that, use the search bar and search for Storage Account
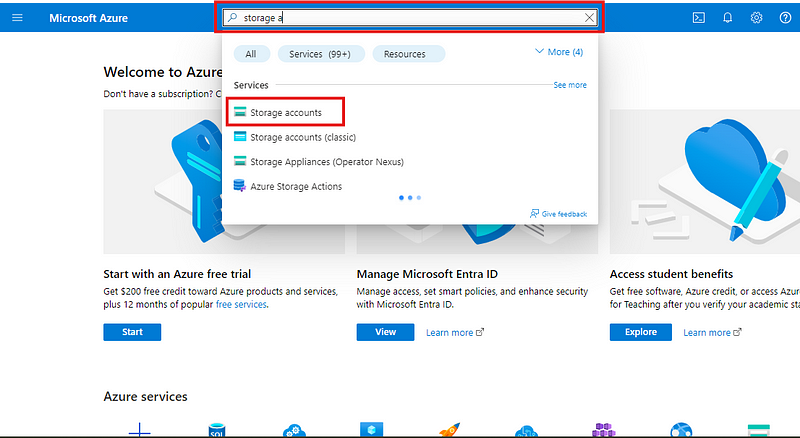
Click on “Storage accounts” and click Create on the top right corner
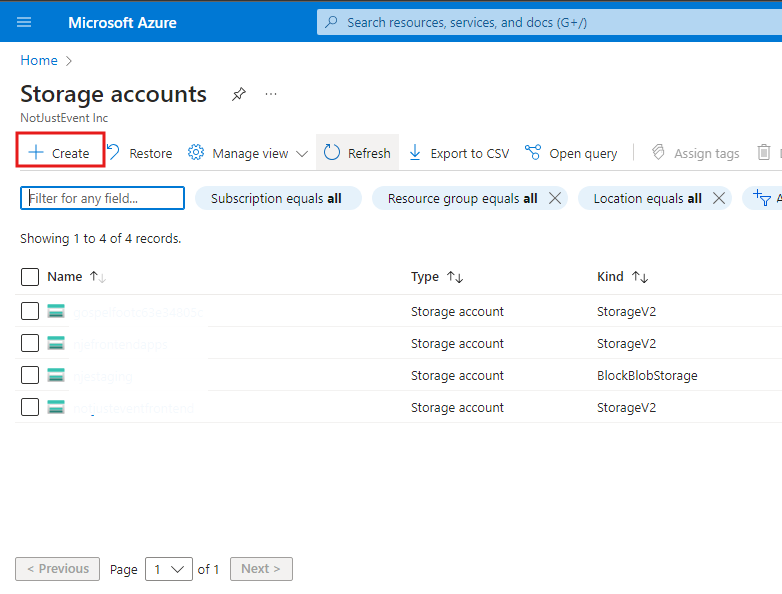
This will take you to a page where you will give your storage account specifications.
input the necessary details and click “Next” then proceed to select any advanced options/tags if required, otherwise click “Review + Create”
Select your new storage account and click “Static website” under “Data management”.
Then Click enable and save
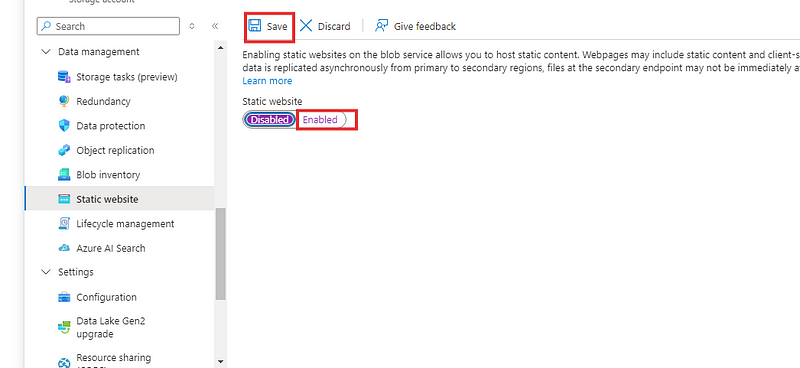
Enable static website hosting and provide a name for the index document (index.html)
NOTE: When you enable static web hosting, a new container will be created for you called ‘$web’,
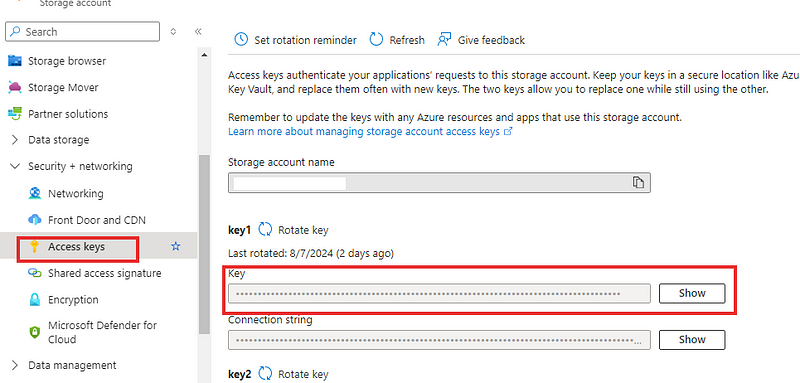
Navigate to “Access Keys” and take note of “Key #1” as we’ll need this later.
3. Create the Build Pipeline
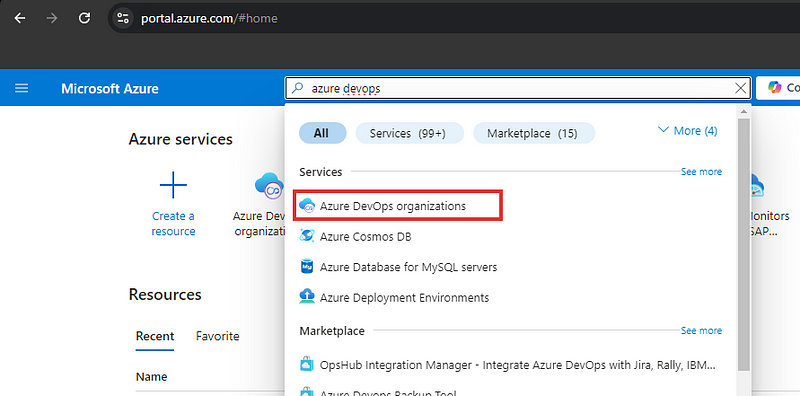
This is where we begin to build our pipelines. On the search bar, type Azure DevOps Organisations and click on the resource.
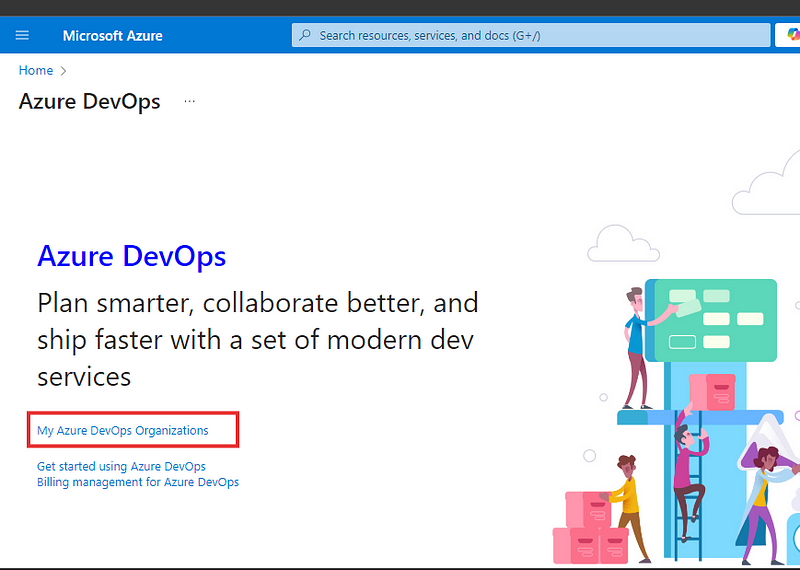
Scroll to the bottom and click Azure DevOps Organisations and then click my Azure DevOps Organizations
This will take you to a new site where you will sign in and create the pipeline, the page will look like the image below, so you will choose either to create a new project with your Microsoft account or switch to your organization using the dropdown menu
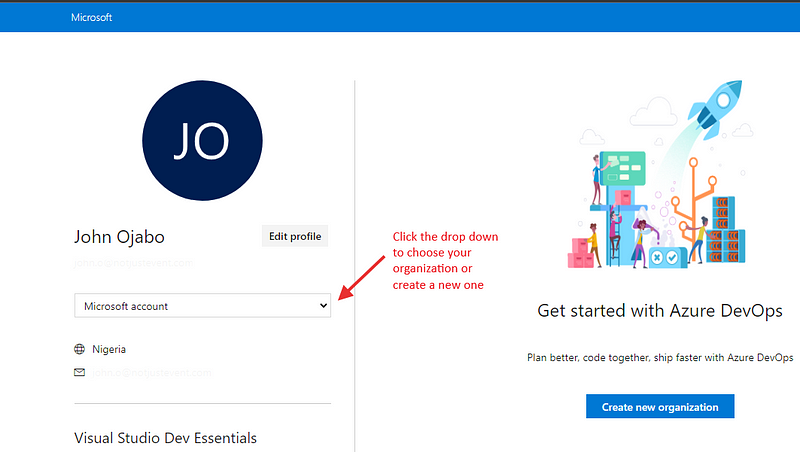
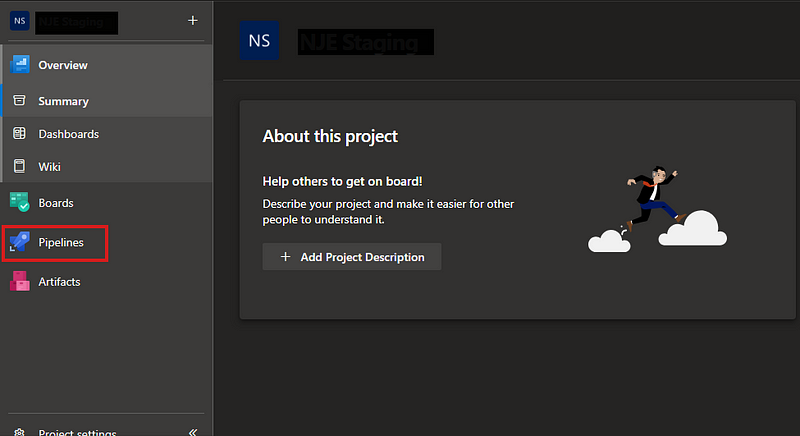
After you log in, you should see a page like this
Set up environment variables
You will need to set environment variables to make your pipeline secure and the variables will consist of 2 keys majorly (It should be more than 2, especially if your static app has a backend that it sends requests to).
To do this, click on Library under Pipelines
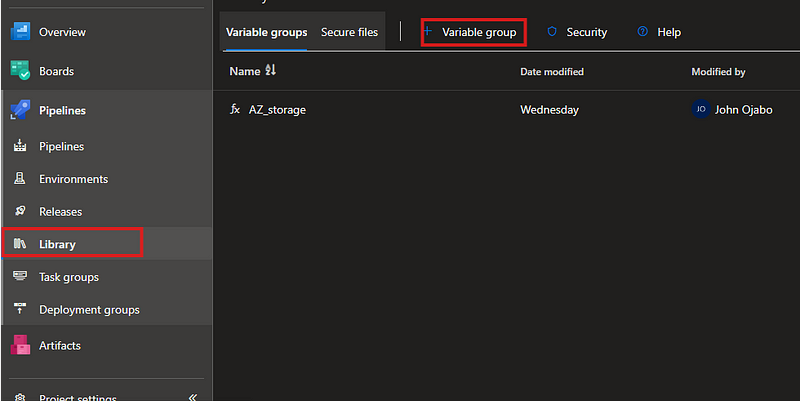
Click the “+” icon above to add a variable group (A variable group stores multiple environment variables in a key and value format) this will enable us to store our sensitive data securely without exposing them on the source code repository.
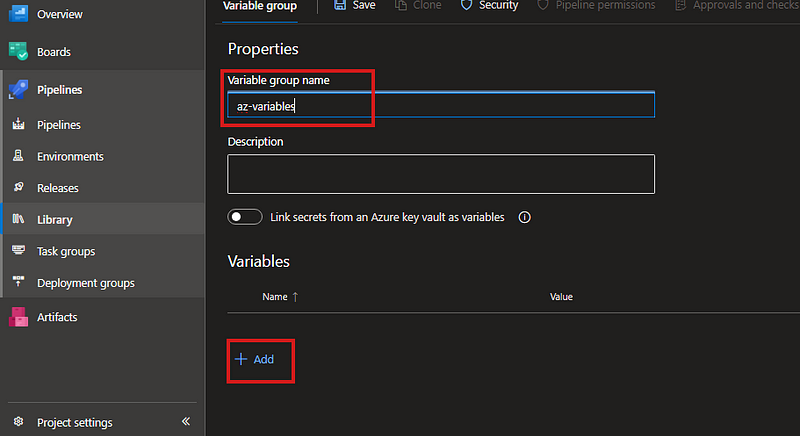
Name the variable group (take note of the name because we’ll need it in our pipeline script)
Click “Add” below to add your environment variables and, in my case, it’ll be like this.
- STORAGE_ACCOUNT_KEY | (copy the account key for the storage account created earlier and paste it here)
- STORAGE_ACCOUNT_NAME | (copy the name of the storage account created earlier and paste it here)
Click the Save icon above.
Create A Service Connection
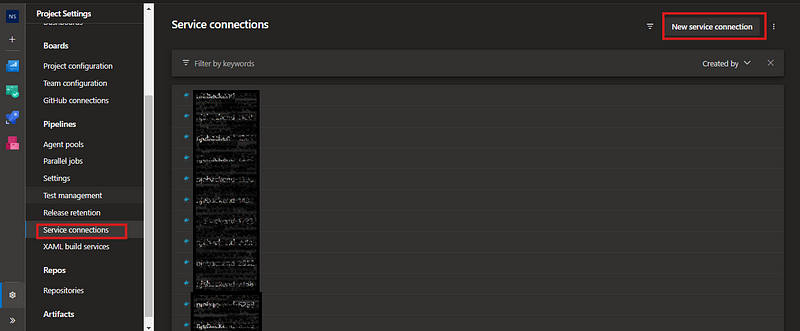
On your left navigation pane, scroll to the bottom and click the projects setting.
- Under the Pipelines, click “Service Connections” and Click “New Service Connection”.
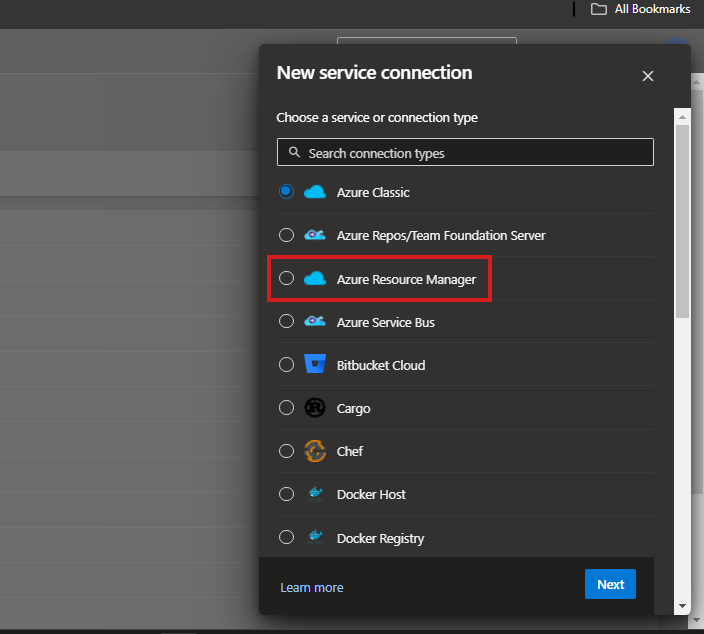
- On the creation page, choose Azure Resource Manager and click next.
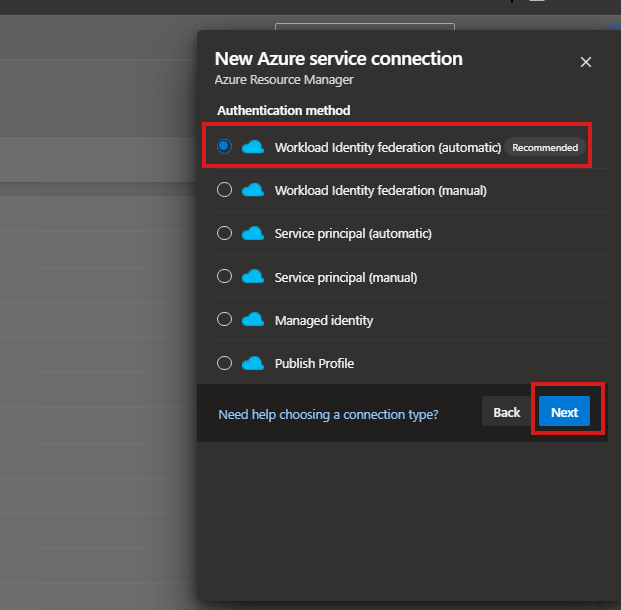
For the authentication method, click “Workload Identity Federation”, it’s already recommended, and click “Next”.
Input your remaining details like the subscription and resource groups and another important one is the name, because it’ll be used later.
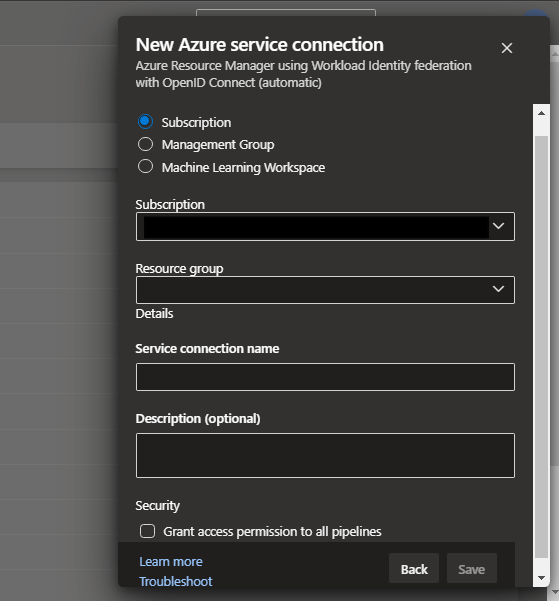
After filling the information, click save.
Create the pipeline script
- On your left navigation pane, click on Pipelines, and then click “Create new pipeline”.
- Select your source code repo (My code is stored in Github)
- Scroll to the bottom and click “Starter Templates”, this will open up an editor.
My code looks like this
trigger:
  branches:
    include:
      - staging
pool:
  vmImage: 'ubuntu-latest'
variables:
  - group: AZ_storage
steps:
  - task: NodeTool@0
    inputs:
      versionSpec: '20.x'
    displayName: 'Use Node.js 20.x'
  - script: |
      yarn install
    displayName: 'Install dependencies'
  - script: |
      yarn build
    displayName: 'Build the React app'
  - task: AzureCLI@2
    inputs:
      azureSubscription: 'static-pipeline'
      scriptType: 'bash'
      scriptLocation: 'inlineScript'
      inlineScript: |
        az storage blob upload-batch -d '$web' -s ./dist --account-name $(AZURE_STORAGE_ACCOUNT) --account-key $(STORAGE_ACCOUNT_KEY) --overwrite
    displayName: 'Upload files to Azure Storage'
For this block
trigger:
  branches:
    include:
      - staging
The pipeline is set to trigger on the staging branch (so choose the branch you want the pipeline to trigger)
For this block
variables:
  - group: AZ_storage
Remember the variable group we created earlier, replace AZ_storage with the name of your variable group
For the following blocks
steps:
  - task: NodeTool@0
    inputs:
      versionSpec: '20.x'
    displayName: 'Use Node.js 20.x'
  - script: |
      yarn install
    displayName: 'Install dependencies'
  - script: |
      yarn build
    displayName: 'Build the React app'
This depends on the application’s technological stack (this app was written in typescript), so these are the steps used to build the application.
- The app uses Node version 20
- Yarn install to install all the dependencies from the package.json file
- yarn build to package the app into static files (HTML, CSS, and other assets etc.)
For this block of code
- task: AzureCLI@2
    inputs:
      azureSubscription: 'static-pipeline'
      scriptType: 'bash'
      scriptLocation: 'inlineScript'
      inlineScript: |
        az storage blob upload-batch -d '$web' -s ./dist --account-name $(AZURE_STORAGE_ACCOUNT) --account-key $(STORAGE_ACCOUNT_KEY) --overwrite
    displayName: 'Upload files to Azure Storage'
Remember the “Service Connection” we created earlier, replace the
azureSubscription: 'name of the service connection'
For the final piece of code
az storage blob upload-batch -d '$web' -s ./dist --account-name $(AZURE_STORAGE_ACCOUNT) --account-key $(STORAGE_ACCOUNT_KEY) --overwrite
The above command pushes the static site to the storage account container.
Here is a detailed explanation of the command and its options
-d '$web' = name of the container in the azure storage account
-s ./dist = source folder that contains the static files (this may differ across projects)
--account-name $(AZURE_STORAGE_ACCOUNT) = this references the env variable with the storage account name
--account-key $(STORAGE_ACCOUNT_KEY) = this references the env variable with the storage account name
--overwrite = this overwrites the previous code version in the storage account in order to implement Continuous deployment
Note: Edit the pipeline script and replace values where necessary.
After this, Click validate and save in the top right corner.
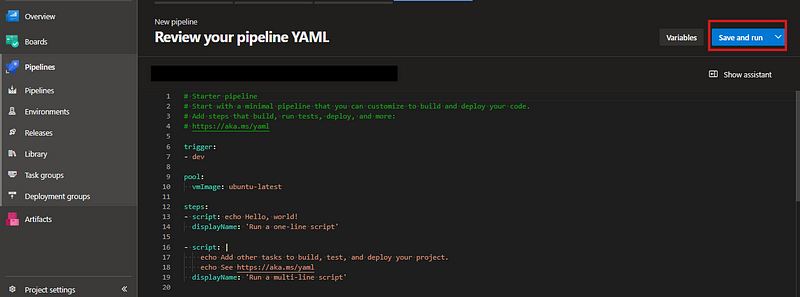
This pipeline will be triggered anytime there is a merge or a commit to the branch, You can manually trigger your pipeline to confirm if it’s successful.
Final Step (Accessing your Website)
Go back to the storage account created earlier, in the left navigation pane, under Data Management.
- Click on Static website.
- You will see the link to your website, copy and paste it on the browser.
Your website should be displayed on the browser!!!
Bonus (Mapping your domain to your website on Azure)
- Log in to your domain provider.
- Create A CNAME record with your desired value and paste the website link.
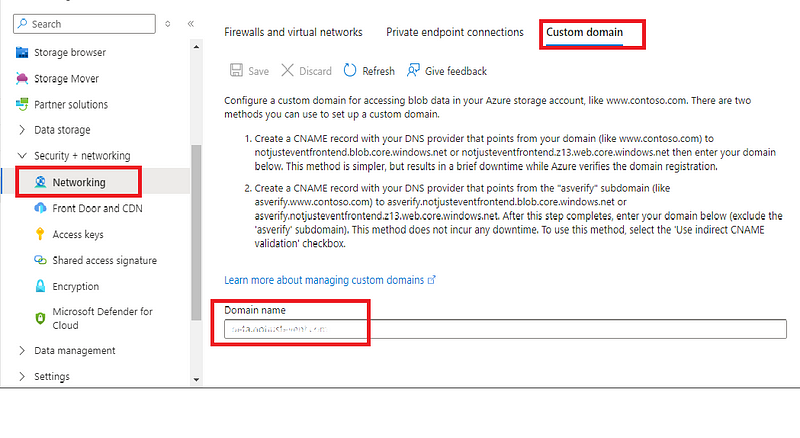
Type in your domain name on the browser and validate.
Note: This may take a while to propagate (from a few minutes to 48hrs)
Thank you for this post @namespace, this is really helpful,
this strategy can save up to $20k annually !!!!!